Sewing, thrifting and the like...


Sunday 7 June 2015

A winter coatigan

This coat is a quickie winter layering piece. It's somewhere in between a coat and a cardigan. I think because it is draped and has no structure (in this fabric) and it is not lined, it feels like a big warm fluffy cardigan. I do love it...nothing like a secret or not so secret, blanket to snuggle under in Canberra's super cold winter.
The pattern is the Tessuti Sydney Jacket.

I made a size small and I think I could probably have done with making the extra small! I am in no way extra small - I am generally an Australian 12 - this pattern just runs super large.


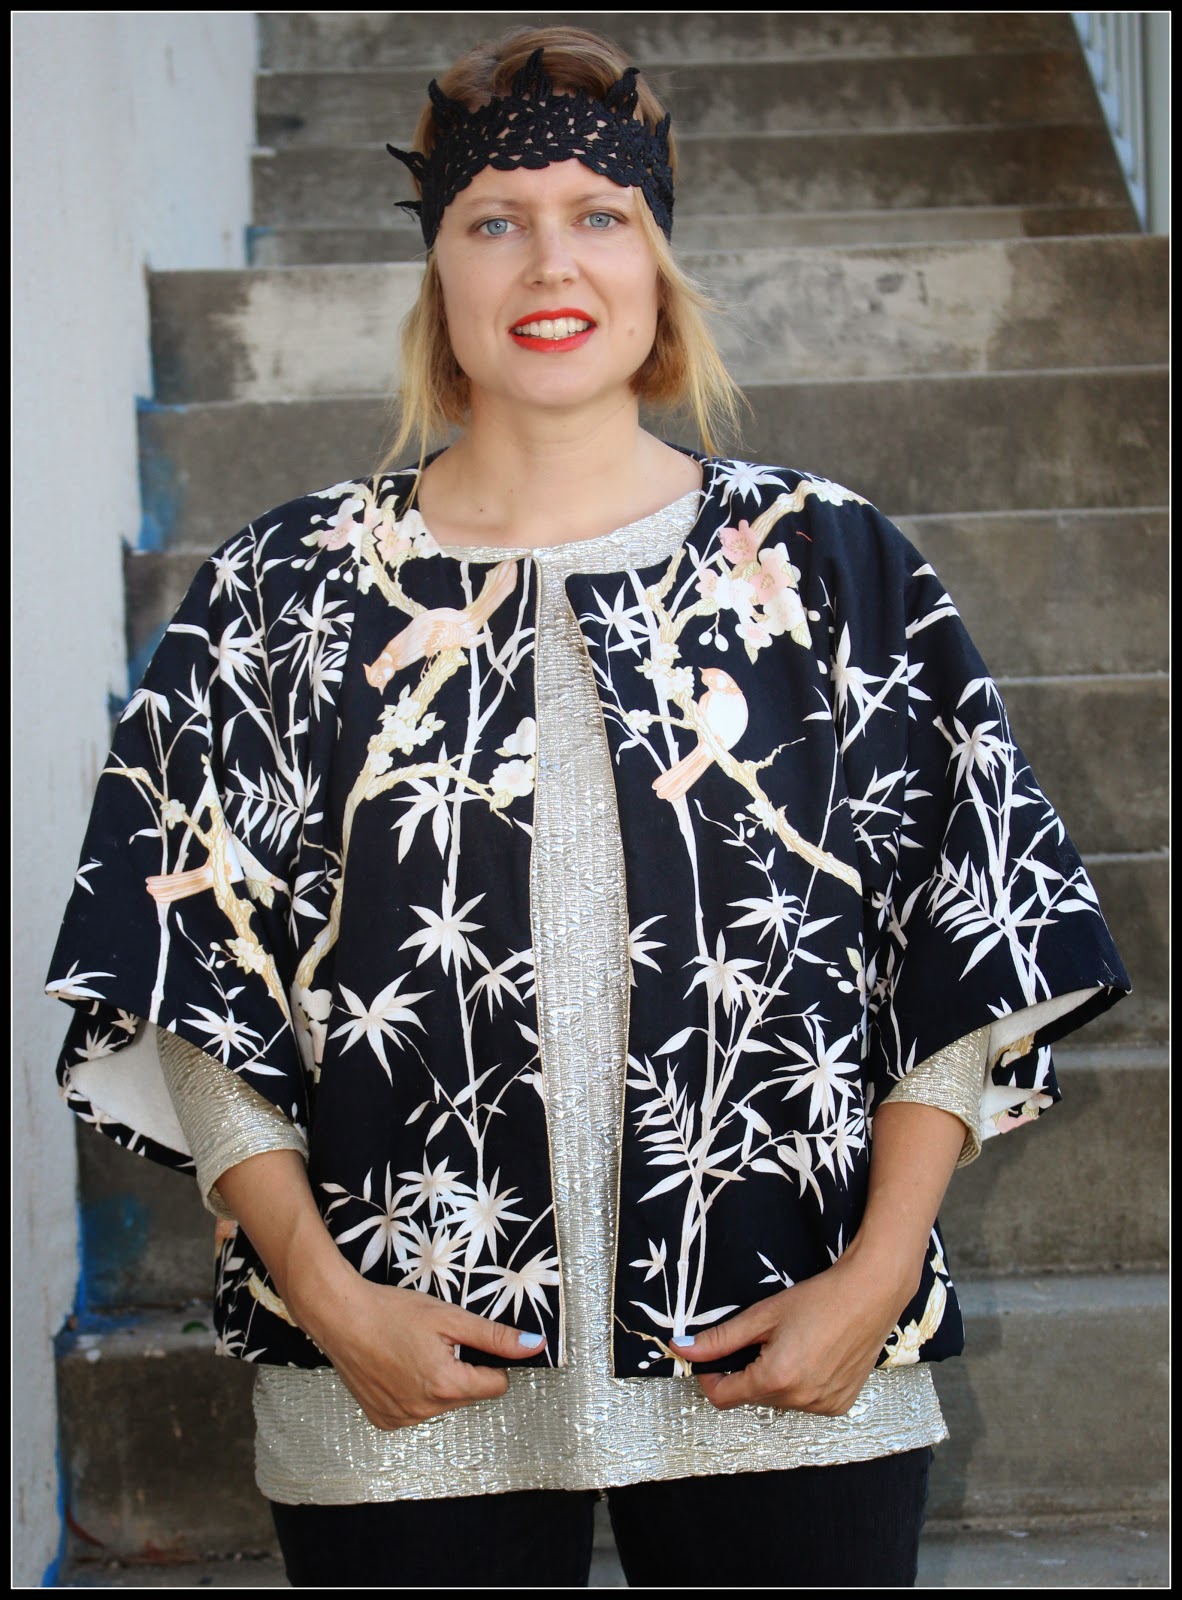
Lots of lovely ladies have made it up in beautiful coloured boiled wools. I haven't seen any other patterned ones yet. I chose this beautiful black and white checked/houndstooth-esque wool blend from Spotlight. They had a 40% sale on mothers day and this was my treat to myself. It is woven on the outside and snuggly fleecy on the inside. So its totally perfect for this unlined jacket.


Well.....hmmm...perfect?
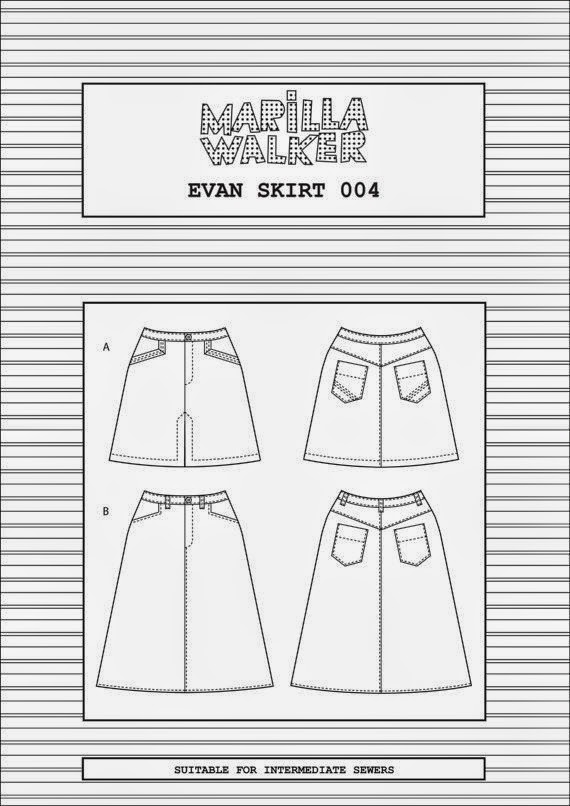
The pattern says "Ideally made up in boiled wool knits, ponti knits, boiled felted wools and neoprene fabrics. IMPORTANT: Not suitable for woven fabrics that fray when cut." This is because the fabric pieces are overlapped and so one of the cut edges is visible. I decided to ignore this advice because I happen to love the look of frayed wool, it adds a bit of texture and interest to the garment. AND I am not very good at doing what I am told...I am stubborn..very at times.

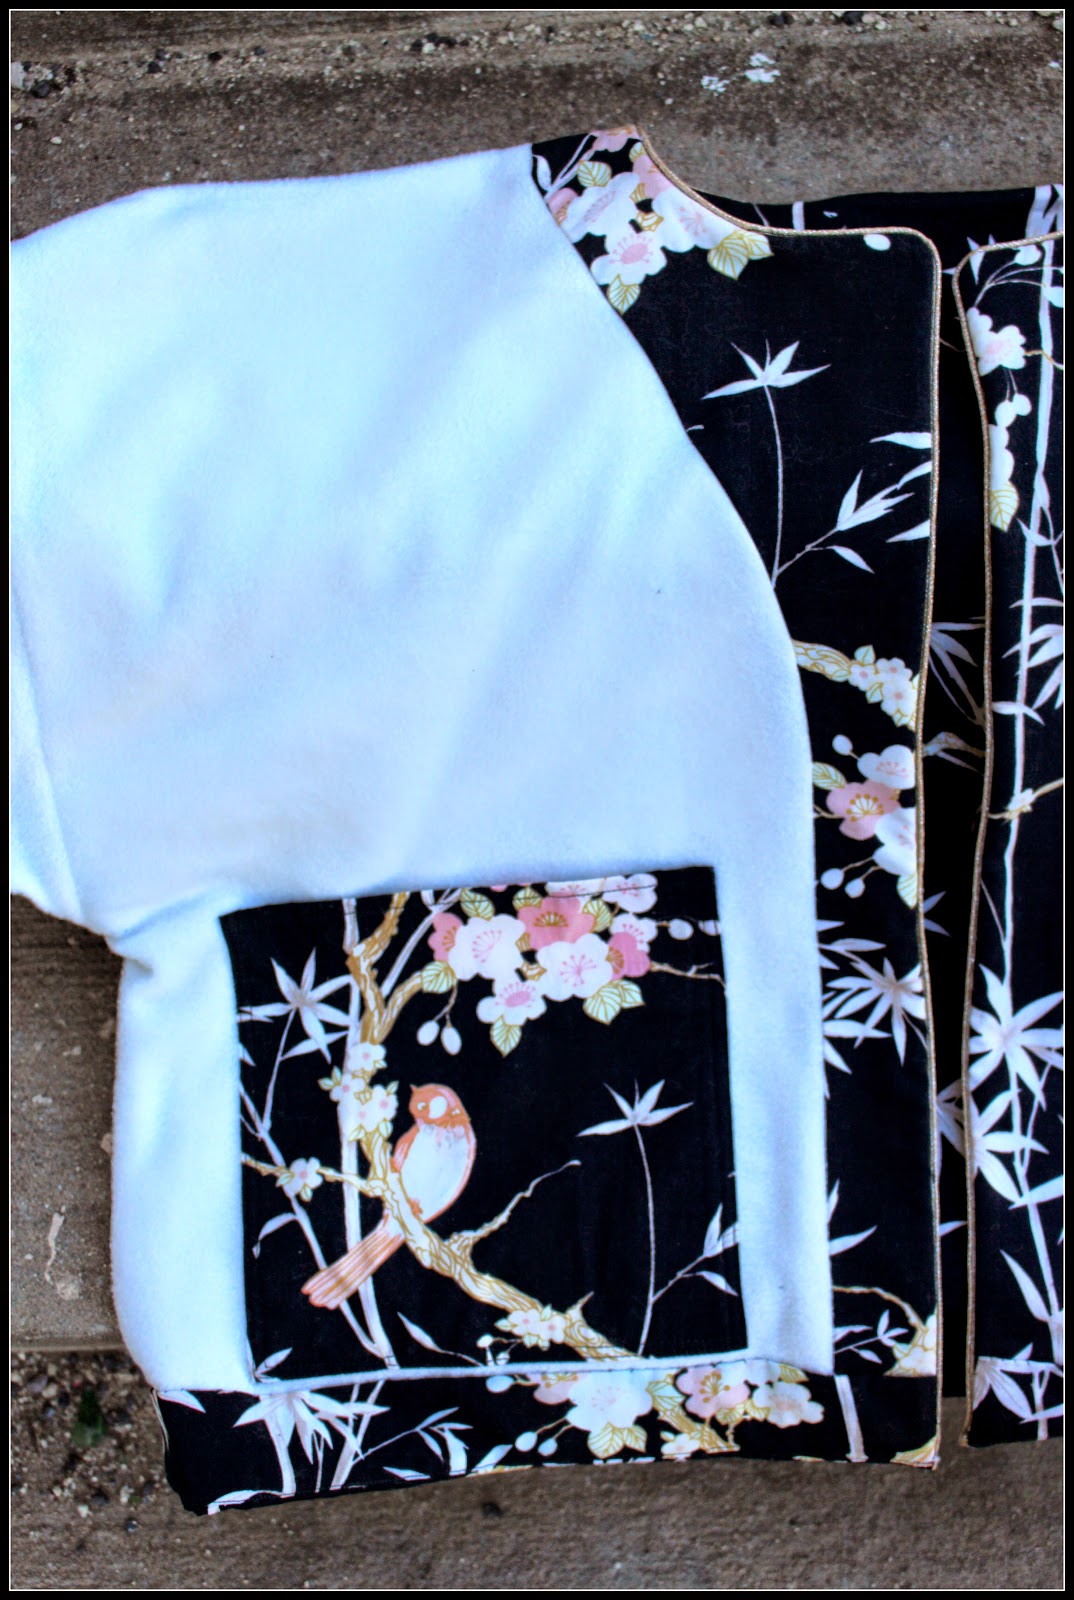
So I sewed the pieces together using a triple stitch to make it extra secure and then purposely frayed all the edges to make it fluffy! This was pretty easy.


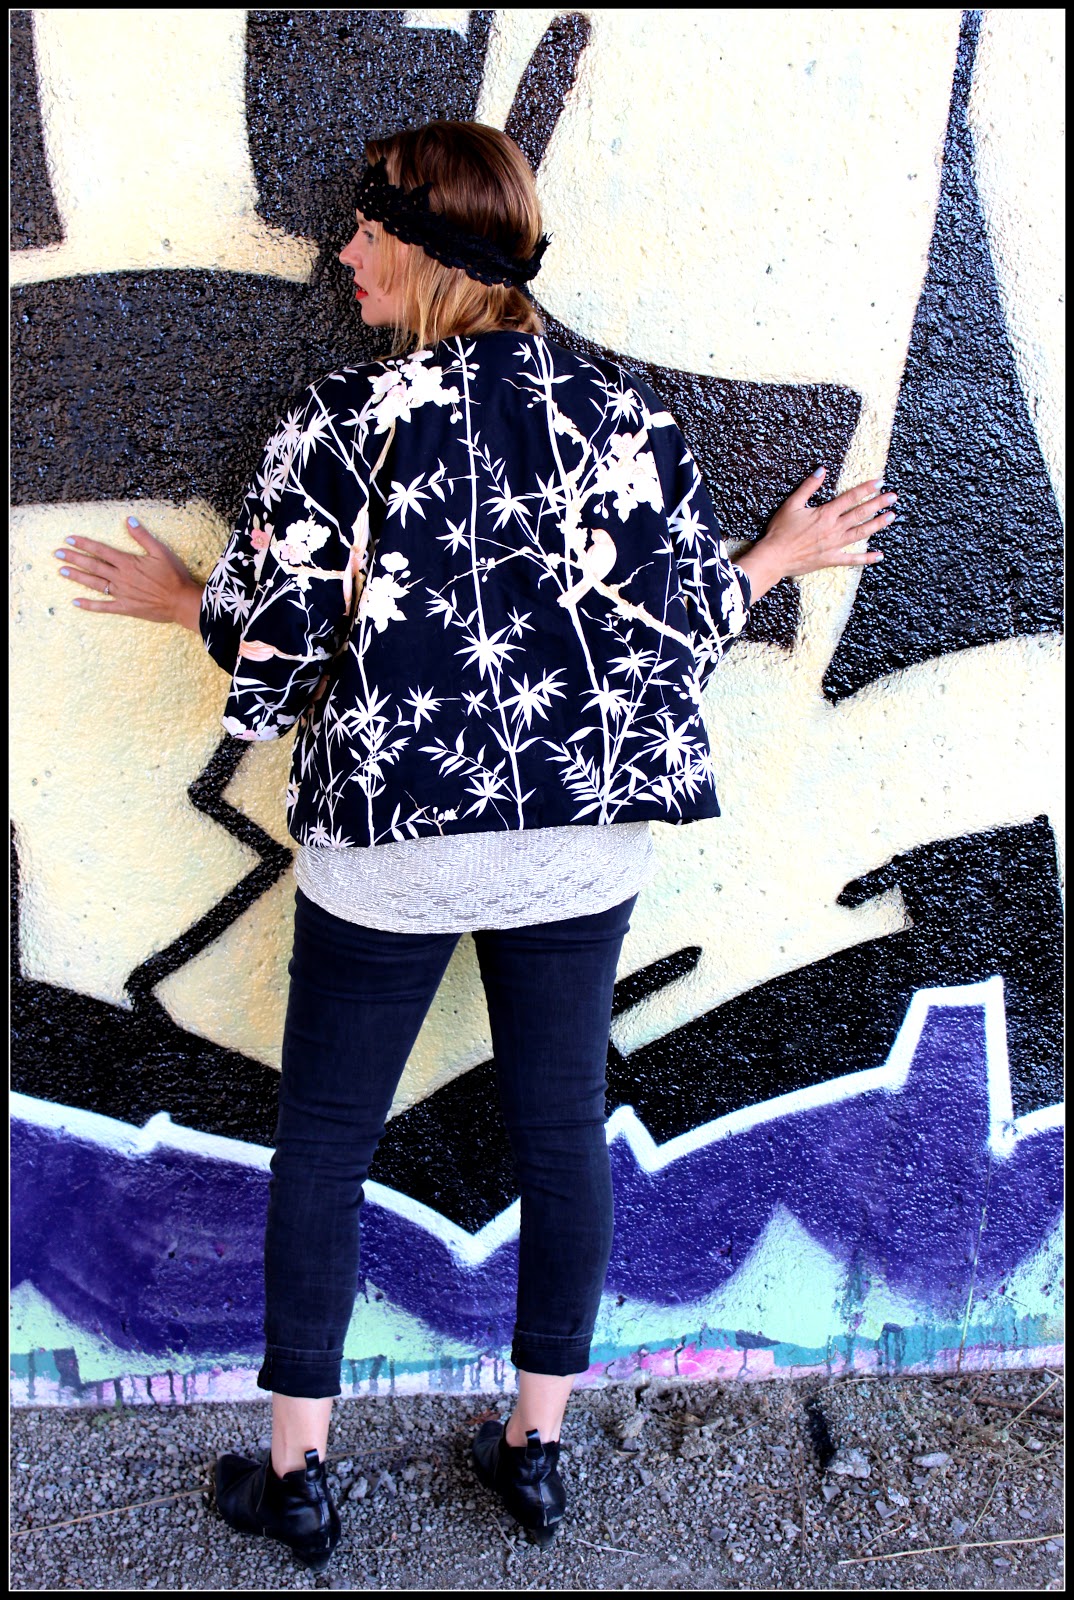
The hard bit was the cutting and the pattern matching in the beginning! Having to cut bearing in mind the pattern placement and the overlapping 3/8inch and also bearing in mind all the other pattern bits and where they fitted. In the end I managed to match the two front pieces, the size seams, the back and the two back yoke pieces. I am stoked with the matching quite frankly!


I didn't bother with the two back under-arm pieces as they are hardly visible and my brain might have exploded trying! Now its not all perfect. I wanted to conserve as much fabric as poss. I hate wastage, especially when I have actually bought the fabric retail. I usually buy second hand fabric to reduce my environmental impact, and for the cost factor. I had more fabric than I needed for the jacket and I want to make a little bolero or waist coat or similar with the remnants. I therefore decided that I didn't care that the pattern was one way. There is a little arrow shape in the pattern, and so some pattern bits have an arrow going up, and others down. Really its only obvious if you look closely. I didn't want to waste fabric getting everything the right way up!


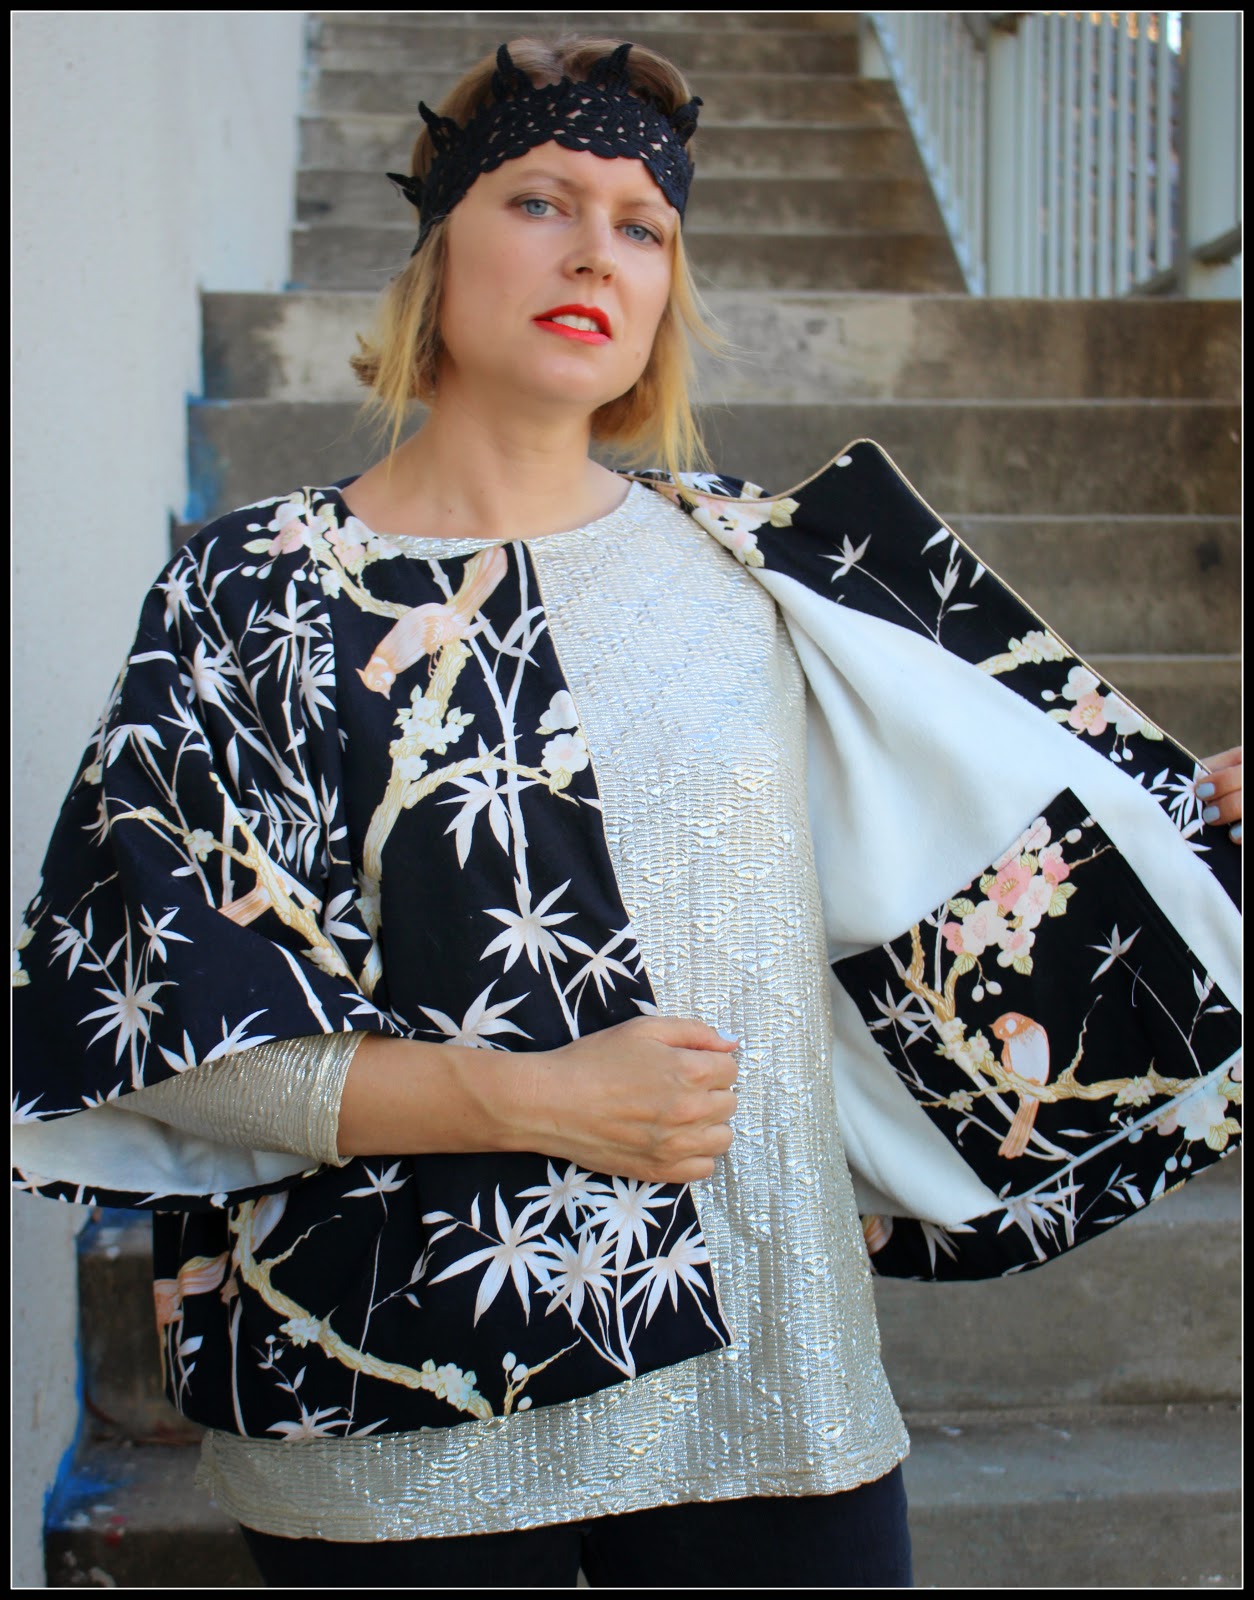
I also changed-up the pockets. The original calls for a kinda welt pocket inserted into the front of the jacket. Which looks really lovely. This would have been lost with the pattern so I decided to just add inseam pockets. I just ignored pattern piece A and cut two pairs of piece B. Easy. I used the snuggly side of the fabric on the inside, so my fingers will be super warm and happy all winter long, yay!


This coat was pretty quick to make and was a nice change of pace after the craziness of study. It was also a total procrastination piece. Am supposed to be working on my final coat assessment for class. Its due Wednesday. I am also supposed to be sewing a dress for Frocktails in 3 weeks. I havent even started that! Will not be going at this rate!!!


I spent a beautiful afternoon with my family down at the Cotter River, only about 20mins from my house. It was a beautiful sunny but cool and windy day. This jacket was just perfect for keeping out the chill. I hate being cold and I get cold easily. I actually felt kinda stylish, although I was of course covered in kid scum very quickly! I am sure you will find me wearing it all winter long!


Saturday 4 April 2015

Grey Clouds

I was very much on the fence about this skirt pattern to begin with, I loved how it looked on others, just wasn't sure if it was very me. I don't ever wear this shape or length. But the pattern called me, and so did the lovely Marilla Walker (she designed the Maya dress I blogged recently), and I thought what the heck...pattern queue be gone..and off I went into cloud land.


Marilla's new pattern is called the Evan skirt. It has a very 70's look if you choose the short version and 90's if you choose the longer grungier look! There are various cute little details which you can add. I went with the short length, front split and plain pocket details. I made it up in a size 5, which is pretty good. I have quite a thick waist in comparison to the rest of my measurements, the result of a jelly-belly post babies and a short torso. From my sizing, I ummed and ahhed about doing a size 6 but ultimately decided I didn't want much ease and went with a 5. If I was using a thicker fabric, I might have regretted that decision ;)


The fabric is a photorealism printed cotton drill that I bought at Spotlight in Hobart at Christmas. I have a real thing for clouds, clouds and trees. I do put a lot of cloud photos on instagram, sorry, but they are just so magical. So I am always on the look out for cloud fabric. This one is really lovely. Its actually quite thin, but really easy to work with. I used my new/old 1950's Singer machine for the seams and my old/new 2000's machine for the top-stitching. The old singer machine is so beautiful, it purrs, and I am addicted to sewing on it now. It just feels more real and homely and special, sorry, terrible wanky, but it does I SWEAR! Doesn't help that the newer machine needs a service, it carries on sewing for atleast 3stitches when my foot is off the peddle sometime...gives me and my fingers the hee-bee-jee-bee's!!


And yes I went with the pattern matching on the back pockets. Can you spot?


You can't see the pockets from a distance, but here is a close up! I only had a metre and a half of this fabric, and it wasn't very wide. The patterns calls for 1.5metres but that is without pattern matching! I literally had a handful of scraps by the end, which does warm my tree-hugging heart but was a bit brain-taxing! I knew that I couldn't match everything, so I went with the centre front seam, the centre back seam and the back pockets. These would have been the most obvious if I hadn't matched. The waistband and yoke make my eyes twitch a bit, but I suspect they will mostly be covered. Still pretty happy I managed to get whole clouds where I wanted!!


The skirt has these funky shaped pockets. Really love the angle, it's a little detail but it's rather cool. If you look at the technical drawing, there is an option for a pleat detail for both the front and back pockets. I didn't bother with this skirt because it would get lost in the pattern, but would definitely do it on a plain version. It's all sorts of fancy pants.

There is a very cute front slit. I really like the effect and it was pretty easy to do. I might add random slits to other seams on outfits from now on, just cos I know how! The fly zip and button went in pretty easily. I actually don't mind doing this jeans style zip anymore. Anyways I need some practise as I really want to make some jeans soon. 

The pattern is great. I really have been converted to this length/shape! Sometimes I need to be pushed out of my box I think!

I did struggle at times with getting my head around the instructions. I think this is because a) I am only a beginner and this is an intermediate pattern, and b) I am a very visual person so I do MUCH better if there is lots of pictures and sewalongs and stuff. Still, I figured it all out and therefore it can't be that hard, cos honestly I have no idea where I lost my brain, but it is long gone...
 

It's been pretty cool here the last few days. It's definitely Autumn, with a hint of Winter. The length of this skirt makes it great for layers with tights and socks and ankle-warmers (yep 80's child) and I reckon I will wear it lots and lots over the next few months. Hope the days are a little sunnier than the fabric mind you...

Monday 9 March 2015

Japanese Jacket

I have developed a slight addiction to Japanese sewing books, along with half the sewing world. They are so very very cute, and cool and totally kooky as a rule. I like kooky :)

When I saw (via my lovely/gorgeous/talented friend Ute) on @stoffbuero's Instagram account that there was a Japenese sewalong going on, I decided to hop on that train. Basically, make something from a Japanese pattern book and blog it! I asked for a few of these books from various relatives for my birthday, thanks sisters!! The hard bit was picking a pattern. There are some real random gems in these books and a lot of bagginess and frills which aren't necessarily my cup of tea, but what they do really well is structure and shape. That I love.

I eventually settled on pattern X from the Stylish Dress Book by Yoshiko Tsukiori.


I really like the shape of this top - lots of rectangles. I seem to go for that look. However, I didn't want a blouse and I didn't want it in thin material and I wanted it with a centre front opening, not just a slit. I wanted to try and emphasize the shape too! This is what I ended up with:
 

 Basically, a winter jacket!

Same shape. I love the shape, which I think is pretty true to the original photo.


You can see here the rectangles! The large sleeves are awesome! 


The fabric is pretty awesome. I actually found it for a few dollars at a car boot sale. A lady was getting rid of a whole load of random bits of fabric that had been stuck in her garage, or some such, for probably decades. There was probably a metre and a half of it, in two panels, which had been sewn together and hemmed. There was fading in some areas so I suspect it had been used as a very cool curtain at some point! It actually makes me VERY happy to breathe new life into a bit of unloved fabric. Hence my complete addiction to saving fabric from op-shops and garage sales ;) The fibre is cotton and its really quite thick...definitely curtain material!! The fact it has this divine peach and gold and cream japanese style design complete with blossoms and birds makes it even more suitable for the Japanese sew-along. Yes kitsch, but I feel that is also entirely appropriate to the Japanese style!


I lined the jacket. Canberra gets pretty cold in winter and I wanted to lift this make from a summer top to a winter jacket. I envisage wearing it layered over warm winter woolies during the day and over a slinky little number at night....who am i kidding...with five kids...my nights out are pretty rare! But I am sure it will get worn lots because it seems pretty flexible as an item of clothing.


I lined it with some cream fleece that I had in my stash. Honestly, I think it had been there for about 6years. I seem to remember trying and failing to make a baby blanket for my first nephew! Times have changed. I can bloody sew now, not fantastically, but i would be all over that blanket now! Anyway, the fleece is really warm and soft. I probably would have chosen black if i was buying it, but beggars can't be choosers. Stash fabric means a cheap make! The combination of a very close weave in the thick cotton fabric and the fleece makes this pretty toasty. Too toasty for a warm photo shoot, ahh, the things I do for my blog!

The original top wasn't lined. So I had to use my fledgling pattern making skills to draw up the lining and the facings! Pretty happy with how it turned out. Sure I could tweak it, and some of you probably think my skills are very bodgy, but it works well enough! I also added huge pockets to both insides, I need pockets in my life always!


My skill to learn this time, was yes the drafting the lining/facings but also to do some piping for the first time. I scored about 20metres of this sparkly gold piping out of the sale bin at Spotlight for a few dollars. Win. I love sparkle and the colour goes so well with the jacket. Being the first time, I sewed the piping to the jacket first using my invisible zipper foot and then sewed the lining to the jacket. The front looks pretty good, the inside not so much, but I am sure practise will help that!! And I still have a LOT of piping, so I am sure to get a lot of practise over the years, ha!


Already eyeing up quite a few other patterns from my Japanese pattern books, so i will no doubt have loads more in my future! I have a couple of other makes to blog, so see you soon!!


Wednesday 4 March 2015

A Fruity Maya

This, my dears, is my favourite summer dress.


If it's clean, I wanna be wearing this dress! The fabric is a stunning cotton linen blend from my Spotlight Christmas gift haul. I adore it. Wish I had more fabric and in the other colour-ways too. My sweet friend Jillian, made the most gorgeous culloutes with the blue colour-way.

I thought the linen content would make the dress a crumpled nightmare, but not so. Yes it needs a light iron after washing but I don't feel the need to carry an iron around with me when I wear this! Side note: this would never happen as I am totally allergic to ironing reallly.

The pattern is amazing. It is the very talented Marilla Walker's Maya dress/Top pattern


I love a pattern that has multiple options in one design. I have plans for a few of these! I chose the most simple dress design as I really wanted the fabric to shine and I didnt want to be breaking it up with plackets etc. I followed the instructions pretty much! The only things I did differently was to hand-stitch the facings down around the neck and armhole and the hem. I don't personally like the look of visible top-stitching, not least because mine is never very neat and it ends up looking a bit shit!


I fiddled with the hem slightly, pretty short at the front and curved slightly longer at the back. I like short dresses but don't want to be worrying about flashing people, so longer at the back is a really perfect shape for me. I love the shape of this dress, the way it is quite boxy and falls straight from the shoulder. I might even go down a size around the shoulders next time and try and get an even more defined shape!


I also added bigger pockets. The pattern piece is more suitable for a shirt pocket rather than the gert big pockets that this mumma likes for carrying around all the "treasures", snotty tissues, half-eaten banana's and other delights that I constantly find about my person :). I used the pattern piece as a template and just added a couple of inches all around!

Speaking of pockets....POCKETS! Can you spot them!?


I spent awhile pattern matching, and they are pretty dam perfect I reckon. I like to challenge myself to do something different/new/hard on each make and perfect pattern matching was it on an otherwise simple dress! Really stoked!


Anyway, not a lot else to say. Other than I DID put a little bit of thinking into beaver placement issues. But at the end of the day, with a design like this I was always going to have some issues. But actually I don't give a hoot. I am frankly too old to care!!


The last day of summer celebrated with a summer strut ;) I made this dress awhile ago and have just been slack blogging as per.

From now on in I will be enjoying sewing with winter weight wools and other such lushness. I love layering, so am not at all sad that Autumn has blown in from stage left... x


Sunday 1 March 2015

Short and Sweet


So the Jean craze has hit my hood.
I mostly live in jeans and t-shirts to do all things mumma during the day, but I never really contemplated Jeans as a sewing possibility until these little honeys were let loose on the sewing world. They are, of course, the Closet Case Files Ginger Jeans. There are two versions, the high-waisted skinnies and the low-rise stove-pipe combo. I am a real high-waisted skinny fan as my 'this-lady-has-had-lots-of-babies-wobbly-tum' issues are kept in check with the above the belly-button waist band and as a result i cause fewer tsunamis with my belly wobbles ;) True story.

Anyways, I had an 80cm stretch denim remnant that I thought I could wangle into a muslin/toile and if all else failed I had only lost $6! I knew I would never get the whole leg to fit in such a small piece. As it was there was a fair bit of geometry, triganometry and bobs-your-uncle-try going on to squidge all the pattern pieces on. I might have enough left over to make a mouse a coat (a coat with no collar or pockets or arms) but that's about it. Soooooo, SHORTS it is!!!


I was quite happy to make shorts because it is still blimin hot here in Canberra on many days. The stretch denim is actually quite thin too. I haven't seen anyone else make shorts yet. Presumably because most the sewing world seems to live in the Northern hemisphere, and its bloody cold there. All your snow pictures are pretty awesome you folk up there [waves], but even though the leaves are turning here, we are a long way off needing really thick winter coats and what not. So shorts it is.


Anyway because the shorts are not given as an option in the pattern, I kinda had to fang it, and YOU KNOW how this girl likes to fang it ;) All it took was to guestimate the length I wanted (up your arse and knee-length weren't doing it for me, so I went with somewhere in the middle) make two cuffs, sew and overlock them on, fold them up and top-stitch. I wanted the same navy blue as the jean not the paler blue inside, otherwise you could totally just fold the leg up and stitch, or just free-form and let them get hairy.

So with the summery short theme, I thought I would go a little fluro, because honestly, why the heck not. It seems to suit the summer vibe having pockets of lumo pink and cream lace. The lace was from Spotlight over Christmas when I raided the Hobart store big time when I had a gift voucher burning a hole in my pocket. So the two back pockets, the coin pocket and the opposite pocket facing are all lace, backed with the denim. It isn't stretch lace, but they are happy enough cuddling up with their stretch denim mate. Well they would have been if i hadn't gone a little too crazy with the iron [sad face]. I managed to scorch the coin pocket when pressing the raw edges under, faaark! It looked ok, just a little crispy in a corner, and I couldn't be arsed making another. My slack-arseness came back to bite me big time though. Cos the lumo thread within the lace started unravelling after I had finished the shorts and put them on [very sad face]. I then had to do a bit of Macguyvering, a.k.a unpicking the little bugger and making another and sewing that in. Much more difficult on the finished garment, and its not as neat as it could be but IT WILL DO. Note to self: don't be a slack-arse. Note to self will no doubt be ignored. Sigh.


I used an orangey top-stitching thread too. I am obv on an orange roll at the moment, infact I have totally dumped yellow and moved onto warmer pastures ;) Sadly it doesn't exactly match the lumo orange lace, but the world of top-stictch thread is totally crappy and small, so I didn't have a lot of choice. Any of you can hook a girl up with some wacky colours, please do!


To begin with my machine HATED the top-stitch thread and there was lots of missed stitches and tangled bottoms [the machines not mine]. But after putting an Instagram SOS out I had loads of good advice. A proper top-stitching needle, not the regular jean needle was the go, along with playing with the tension. After that, me and top-stitching are totally bff's. 

I originally cut a size 12, based on my measurements, but the pattern cunningly gets you to baste all the peices together before you sew/top-stitch it all together. I did this and it was waaay too big. So I graded down to a ten from waist to crotch and then to an 8 in the leg. Works fine. I am pretty happy with the fit. They feel really awesome on, super comfy and all that. I didn't have to make any other alterations with the pattern, yay! I hear they are a good fit for most out of the bag, and I think the stretch fabric helps here!


I left off the rivets, its quite thin denim and I didn't want to wreck it. I left off the belt-loops, despite making them, because I was never going to wear a belt with these babies. I also did double rows of top-stitching every where, because i finally got my top-stitching mad skills badge. Oh and I didn't use a jeans button, even though I have a random stash of them. They didn't look right with the summer look, and again the denim wasn't thick enough to NEED one. So I used this blue Oroton-esque vintage button from my heirloom box of button heaven. Tis nice and its shanky, so she got the guernsey.


Also, I actually make the whole outfit!


The t-shirt is a self-drafted white/blue polka dot number (thrifted cotton fabric). The wrapy-kaftan-thingy is made of this divine, JUST DIVINE I TELL YOU, vintage orange crepe de chine (also thrifted). I used the free tutorial from the amazingly talented Esther Boller, It was pretty easy really. I just wanted something simple that would showcase the stunning fabric.


So a whole home-made outfit using thrifted or remnant fabric for around $10. Win!

I do plan to make more, and proper jean-jeans next time. I used my birthday money to buy some black and some blue stretch denim to do just that. Unfortunately, there was no percentages given on the amount of cotton versus elastane, so I might need to guess the fit a bit! I will use all the proper hard-ware next time and flat-fell the seams too. Hopefully give it a more polished look and add some more skillz to my arsenal :)

I encourage everyone to give this pattern a go. I am still very much a beginner sewist and I didn't find them tricky (once i had tamed the arsey top-stitching thread that is). They are time-consuming because of the switching between threads/feets/needles etc every time you switch between sewing a seam and top-stitching (about to be rectified when my new-old Singer machine comes home after some tlc), but there is nothing complicated. The instructions are great and there is also a sew-along on Heathers blog showing everything in photographic detail. So no excuses, GET ON IT folks :)